
With the warm weather finally here, you want to get out there and start grilling. Before you do, you're going to need to clean that grill off. It's been sat there all winter, and it needs to be sparkling clean before you start going to town on it. Here are some of the best gas grill cleaning tips from the experts, to help you get it ready for grill season.
1. Turn Up The Heat
Before you do anything, turn up the heat high on your grill, close the lid, and leave it for 15 to 20 minutes. Doing this ensures that any old burnt-on food and dirt will be incinerated, making it come away from the grates. Once you get in there and start scrubbing, you'll see it's so much easier to get everything off. If you do this, remember that you'll need a grill brush that can take the heat.
2. Pick The Right Grill Brush
Your grill brush is your secret weapon against a dirty grill. Picking the right one is key to getting your grill as clean as it can be. There are three main types of brush to choose from: nylon, steel, and brass. The type you use depends on the type of grill you have. For example, if you have a cast iron or expanded steel grill, you'll want steel brushes as they penetrate the pores in the grate. Brass brushes are better for more delicate grills, such as porcelain grates. Nylon are also a great option if you need a softer brush, as they last longer.
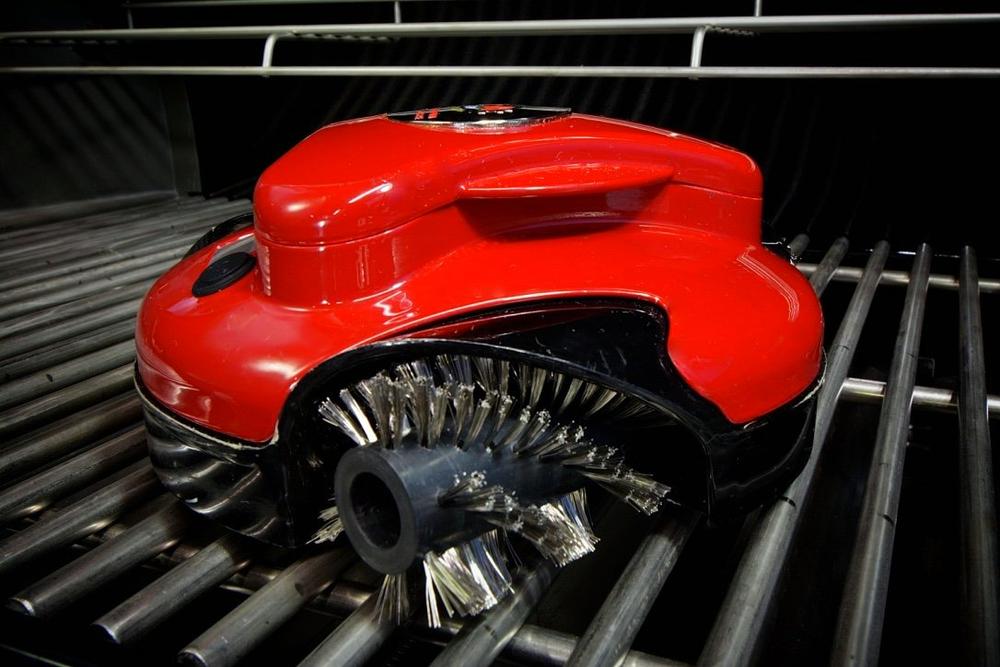
You can get regular brushes that you use to manually brush the grates, or you can buy grill cleaning robots that do that work for you. They can be fitted with the right brush for your grates, so you can customize it to your needs.
3. Turn Off The Gas
Before you start cleaning the grill, ensure that you turn off the gas to it. The valve will be located somewhere on the grill itself, so look up where yours should be. It's so important you do this, as you don't want gases building up as you clean. Once you've burnt the old food off the grates, turn the gas off before you do anything else.
4. Scrub Removable Parts With Soapy Water
You'll see a lot of specialist cleaners advertised for your grill, but the best thing you can possibly use is soapy water. Fill a bucket full of water with some dish soap, and take all the removable items off your grill. This will include the grates, burner covers, and possible the burners themselves if they come away. Simply put them into the bucket and scrub away with a sponge. If you've brushed them first, you'll see it's easy to get them clean. Rinse them off, ready to be put back on the grill.
5. Check Burner Holes For Clogs
While you're cleaning the burners, take a look to see if there are any clogs in the holes. It's easy for food to fall onto them and clog up the holes, meaning that the flow of gas is blocked. If you find any clogs in the holes as you're cleaning them, all you need to do is use a toothpick to gently push them out.
6. Don't Forget The Drip Pan
The drip pan in your grill catches all the drippings as you cook on it. When you're cleaning it, it's important to clean it off to remove the built up grime. All you need to do is use a scraper to gently scrape away the dirt and grease. This removes the bulk of it, then you can use the soapy water to get the rest of the dirt off. Once it's clean, it can be replaced back into the grill.
7. Clean The Underside Of The Lid
The lid is easily forgotten, as you're not putting food on it, but it needs to be clean too. Open yours up and take a look underneath. You'll see that some food may have stuck to it, and there may be other things, like flaking paint, that you need to take care of it. Scrape the paint off gently, ensuring that you don't scratch the existing paintwork and drop any flakes into the grill itself. Clean off the underside with a sponge and soapy water.
8. Put Everything Back And Fire Up The Grill
Now that you've cleaned everything, you'll need to put everything back together. Once you've done that, it doesn't mean that you've finished. You'll need to close the lid, connect the gas back up, and then turn it up high again for around 15 minutes. You do this because it burns off any lingering soap or cleaning product on the grill. It stops it interfering with your cooking, next time you use the grill.
9. Oil Your Grates
The last step to cleaning a grill is oiling the grates. This is an important step, so don't forget to do it. When you oil the grates, you help improve the flavor of your food and stop it sticking to the grates when you're making it. Plus, it helps to burn off any chemicals on the grates, which is especially important when the grill is new or has been cleaned.
To do this, pick an oil of your choice, such as peanut or canola oil. Dip a paper towel into the oil, and hold it with a pair of tongs. Use that towel to lightly spread the oil over the hot grates. Once this has been done, close the grill again and turn it on high until the grates start smoking. You should see that the grates have gone black or brassy colored, depending on the kind of grill you have.
These tips will help you get your grill as clean as it can be before you get it ready for grilling season. Give it a good cleaning now to get the best flavor from your grill, every time you use it this summer.